| Name | Last modified | Size | Description | |
|---|---|---|---|---|
| Parent Directory | - | |||
| Thumbs.db | 2006-06-29 10:49 | 9.5K | ||
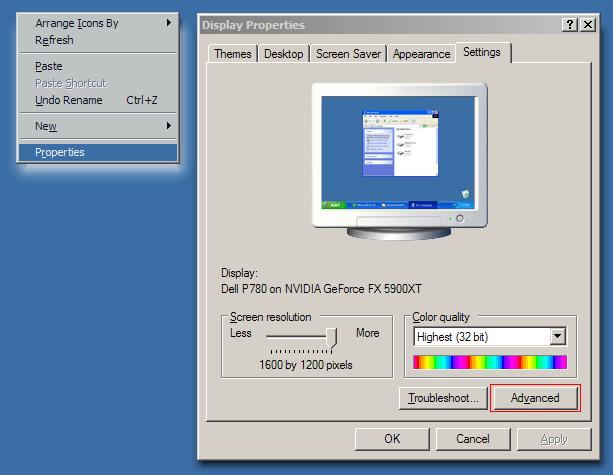
| display_prop.jpg | 2006-06-29 10:49 | 37K | ||
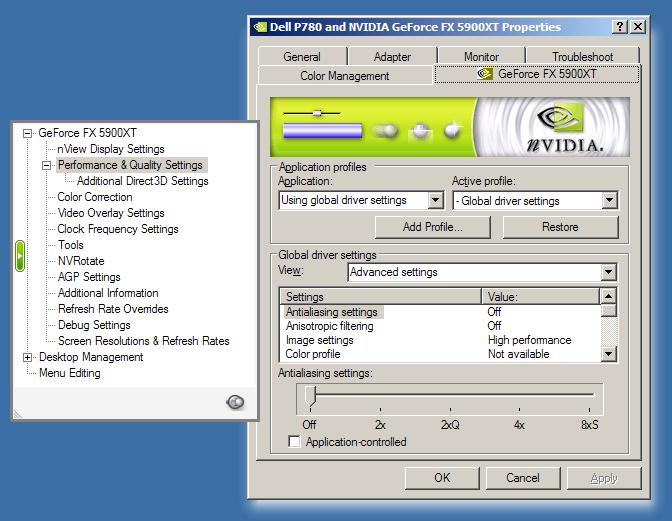
| driver_prop.jpg | 2006-06-29 10:49 | 66K | ||
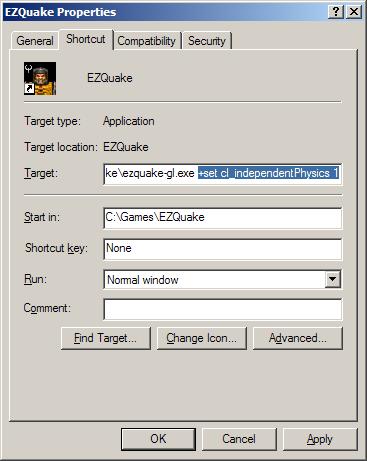
| indphys.jpg | 2006-06-29 10:49 | 28K | ||
| mouse_fix.reg | 2006-06-29 10:49 | 381 | ||
| nv_dl.jpg | 2006-06-29 10:49 | 4.8K | ||
| nv_dp.jpg | 2006-06-29 10:49 | 18K | ||
| nv_hp.jpg | 2006-06-29 10:49 | 11K | ||
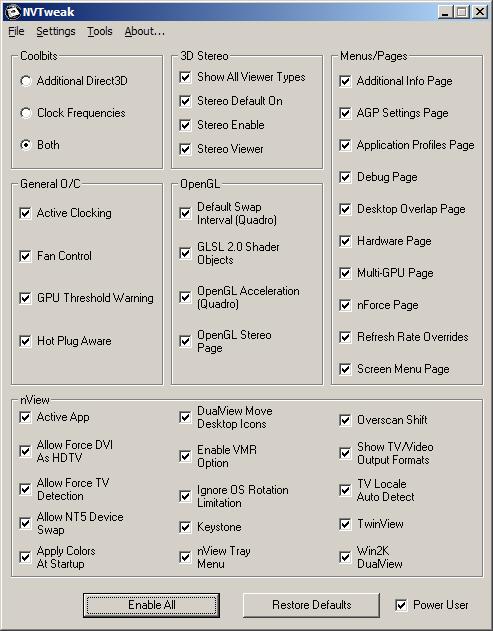
| nvtweak.jpg | 2006-06-29 10:49 | 62K | ||
| original.reg | 2006-06-29 10:49 | 1.3K | ||
| ps2rate.zip | 2006-06-29 10:49 | 111K | ||
| r_drawflat.jpg | 2006-06-29 10:49 | 20K | ||
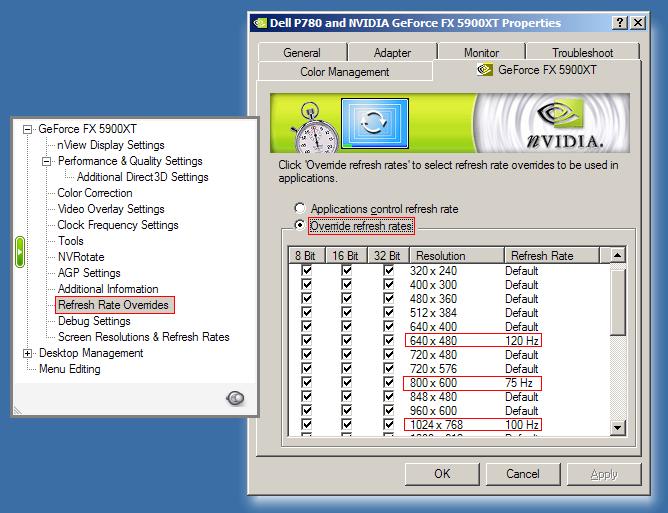
| refresh_over.jpg | 2006-06-29 10:49 | 70K | ||
| refresh_prop.jpg | 2006-06-29 10:49 | 47K | ||
| show_fps.jpg | 2006-06-29 10:49 | 32K | ||
| usbmrs11.exe | 2006-06-29 10:49 | 30K | ||
| usbrate.jpg | 2006-06-29 10:49 | 40K | ||
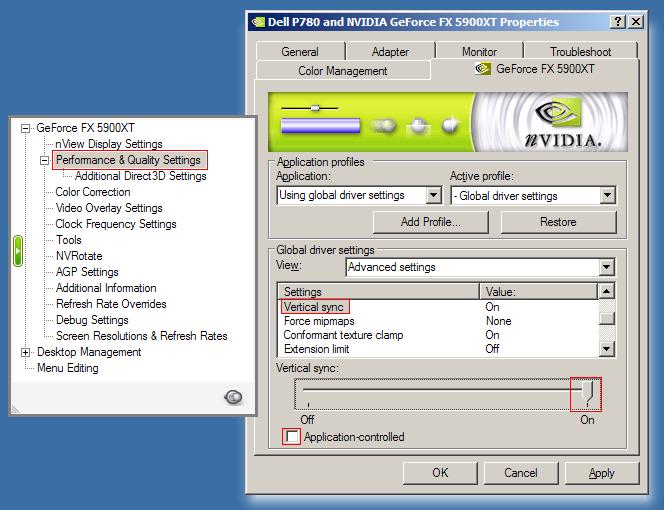
| vsync_on.jpg | 2006-06-29 10:49 | 65K | ||